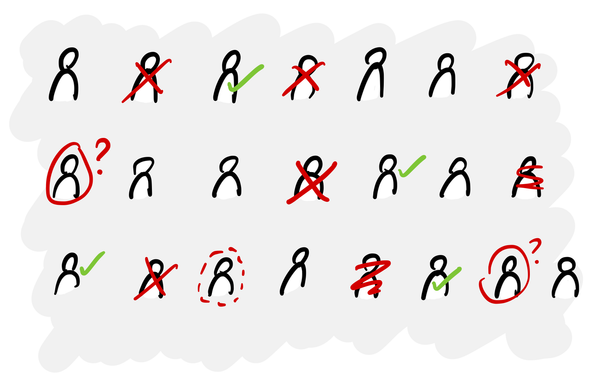
How to prompt AI to generate images for concept design
A practical guide to using ChatGPT/Sora to create storyboards, early-stage concepts and research stimulus.

In the early stages of discovery, when you’re exploring and shaping a new proposition, it’s common to create concept designs or storyboards.
Visualising how a new feature or business will work is useful for aligning your team, gathering feedback from customers and communicating with stakeholders.
These visuals don’t have to be perfect, yet creating them can be time consuming and in this stage of the product development process, you want to be able to iterate ideas quickly. This is where AI can help us.
Prompting for image generation is hard
If you’ve ever tried to generate images with AI, you’ll know that it’s a lot more difficult to get the output you want.
For most people, it’s hard to precisely describe the visual that you have in mind and because it takes a minute or two to generate, the feedback loop is longer. You can easily spend 30 mins of trial-and-error to get one image just right.
This is going to be a two-part guide, which I hope will give you some practical tips to generate your own images for this purpose, without it taking more time than it’s worth.
Separate style from content
There are two core elements to any image prompt:
- The scene: What is being shown in the image, e.g. a woman looks at her phone on a train
- Visual style: How the image should look, e.g. a watercolour or sketch.
When you’re writing a prompt, it’s important to separate these two so that it’s easy to change it when it doesn’t yield the output you’re looking for, and it’s more straightforward to re-use styles for different projects.
This week we’ll look at how to prompt the scene and next week, I’ll share a set of visual styles you can re-use in your own work. Make sure you’re subscribed so you don’t miss it!
For all of the examples here, I’ll be using Sora (the dedicated image and video generation tool from OpenAI) but these tips should work on any comparable tool.
Start with the core subject and action
First, we need to be specific about:
- Who is in the scene: age, role, appearance (if it matters)
- What they are doing: in a non-ambiguous way
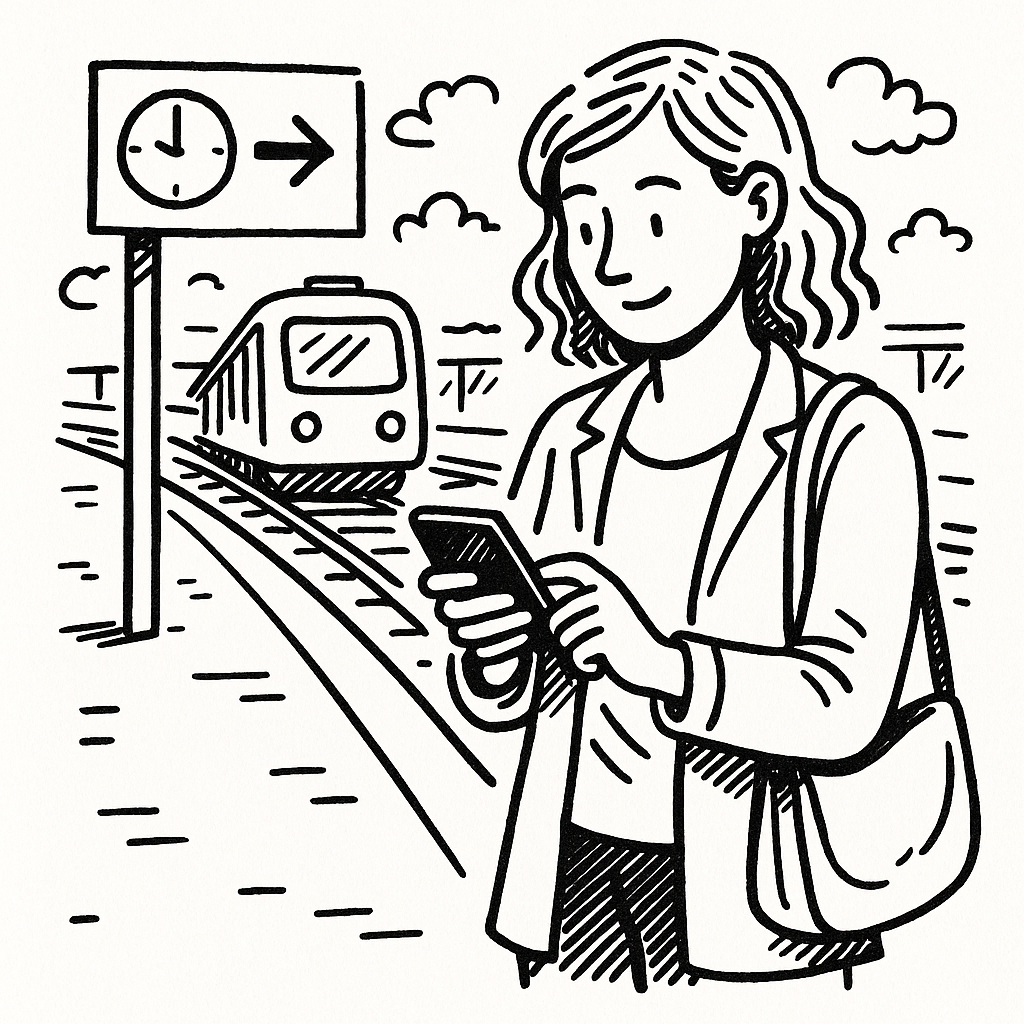
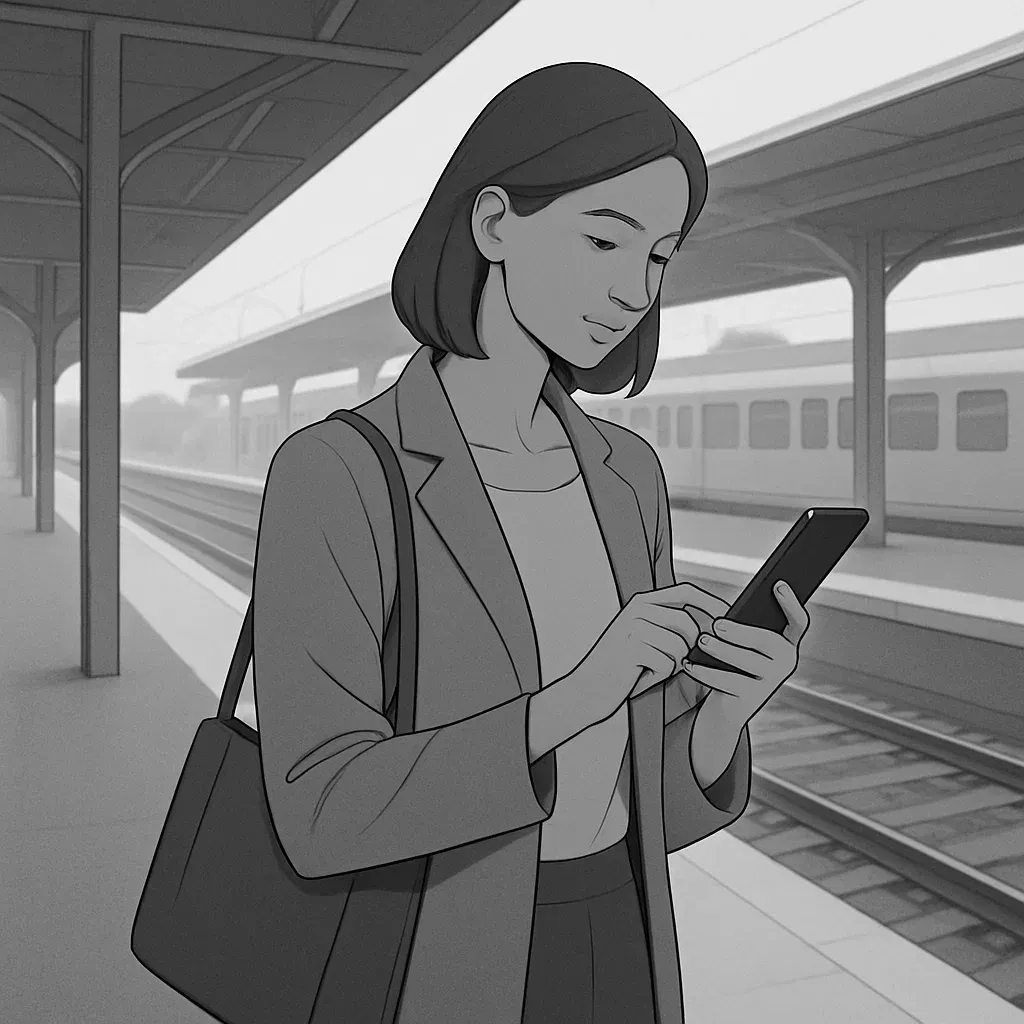
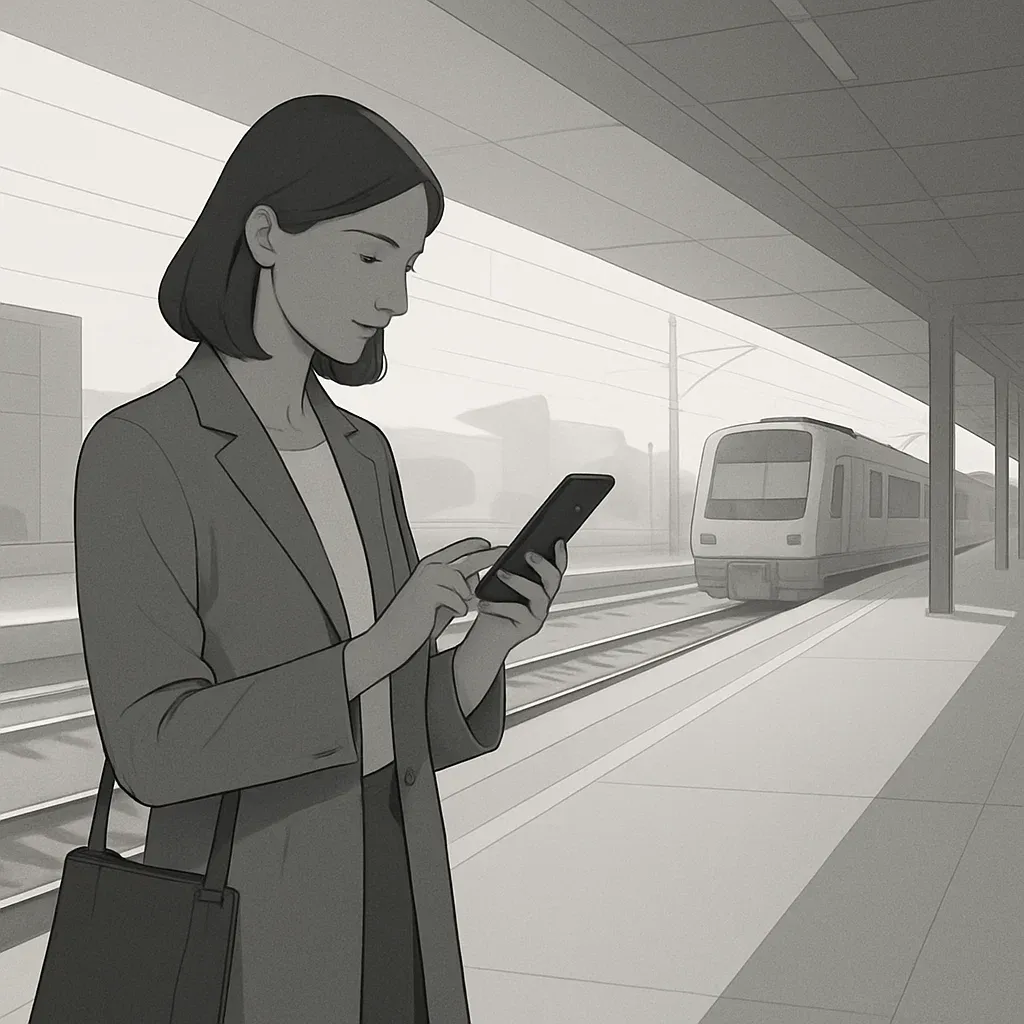
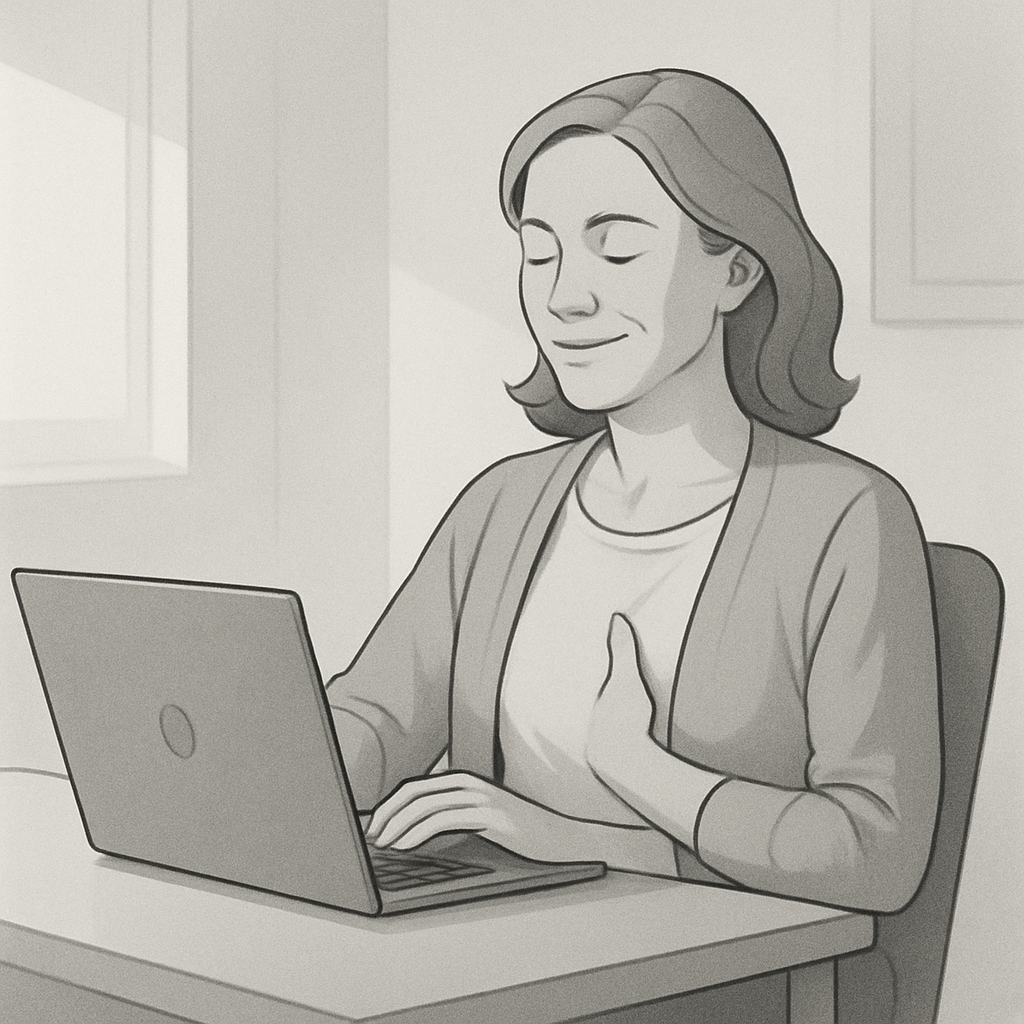
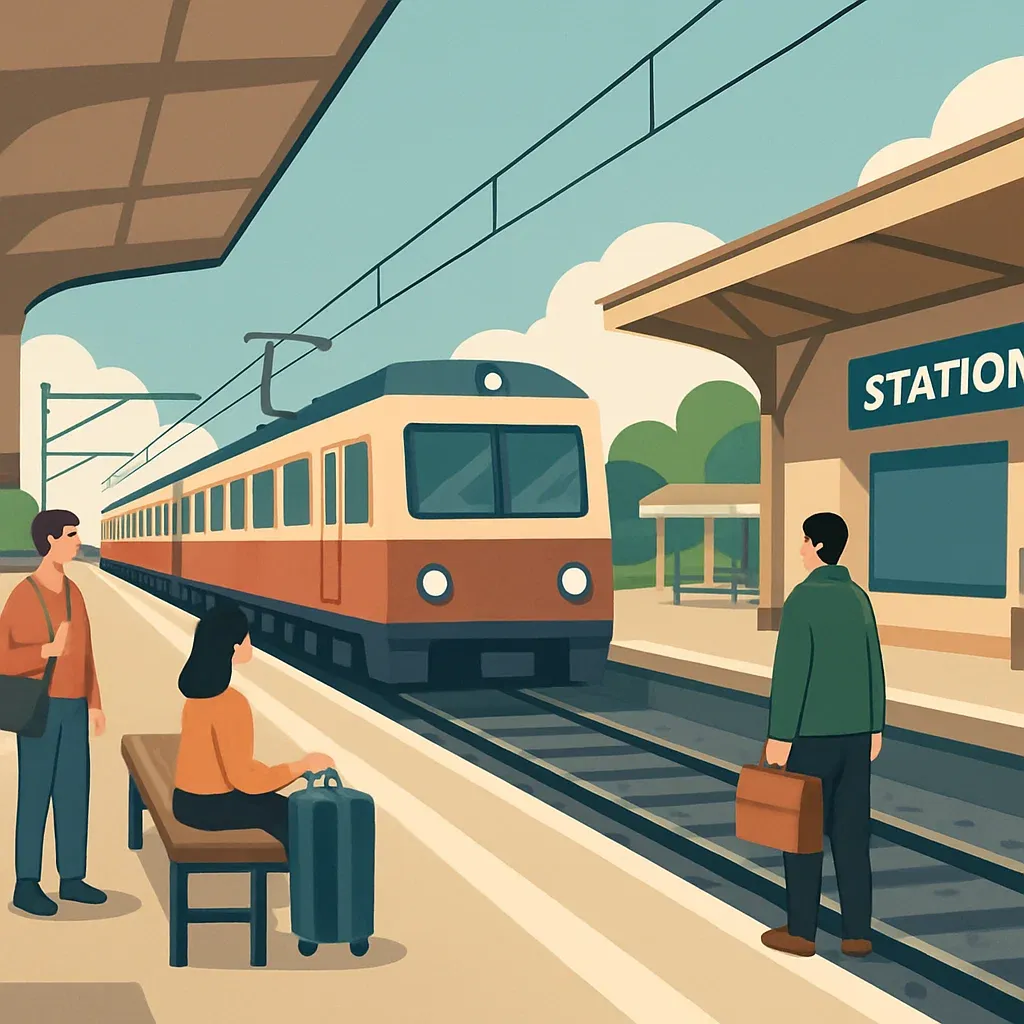
A woman in her mid-30s is standing on a railway station platform, using a smartphone.
Minimalist black-and-white grayscale illustration with clean, precise linework and smooth tonal shading. Fewer sketch lines, with a flatter, more elegant aesthetic. Rendered like a concept illustration — calm, modern, and sophisticated, with natural light and subtle depth. Not cartoonish, but polished and design-focused. No text or writing in the scene.
The more specific you can be, the better control you’ll have over the scene and the less you’ll leave for it to interpret:
- A person vs. a woman in her mid-30s
- Is travelling to work vs. is standing on a railway station platform
- Is at a station vs. is standing on a railway station platform
Set perspective and framing
Images tend to have one of three frames:
- Wide: for establishing shots and broad perspectives of the place the main character is in.
- Medium: for showing the subject in context, capturing both the person and their immediate surroundings or props.
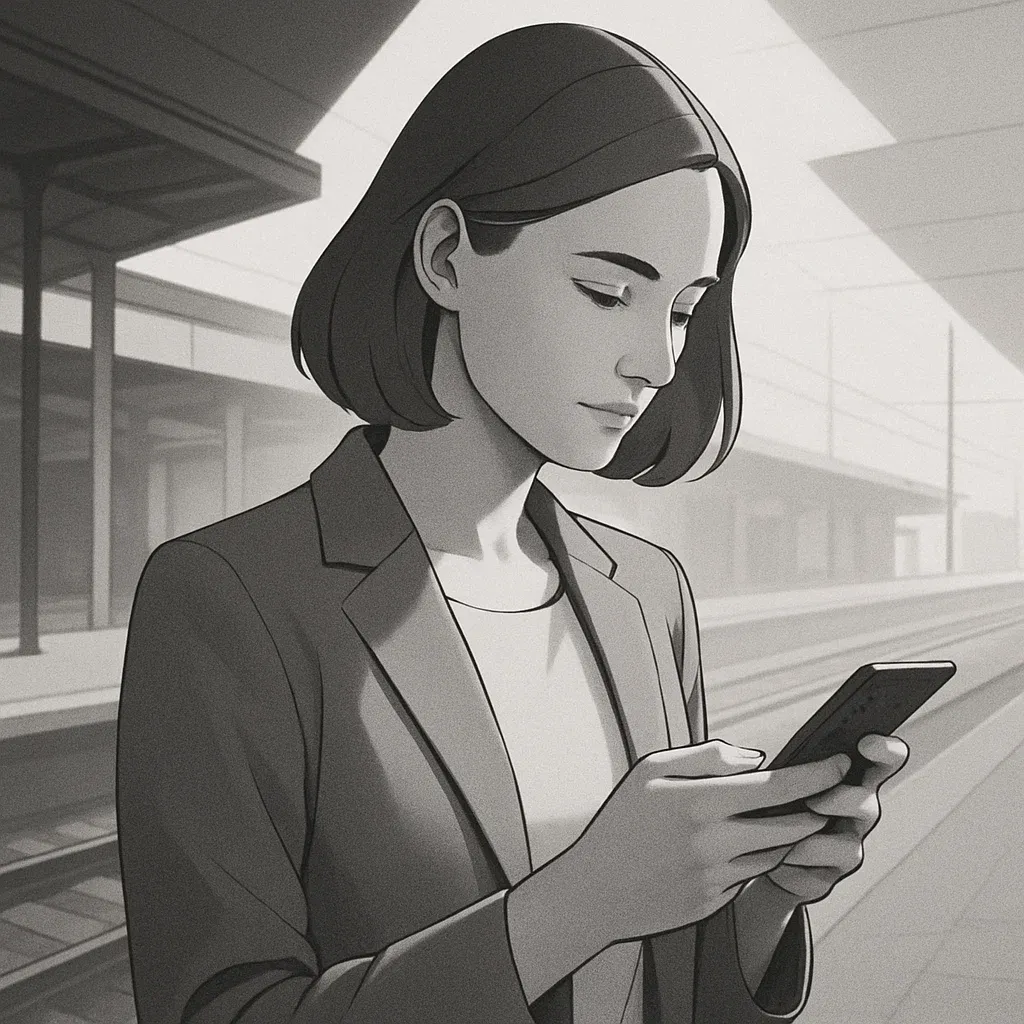
- Close-up: for focusing tightly on the subject’s face, expression, or a specific detail like hands holding a phone.
For most concept and storyboard images, medium shots work best because they balance clarity of action with enough environmental detail to give context to the scene. Wide shots are useful when location matters (e.g. hospital ward vs train carriage), while close-ups are good for emotional cues or product interactions.
If you don’t specify this, Sora/ChatGPT/etc will make an assumption about how to frame the image.
A woman in her mid-30s is standing on a railway station platform, using a smartphone. Wide angle.
A woman in her mid-30s is standing on a railway station platform, using a smartphone. Close-up.
Control the environment
Once you have your basic shot established, then think about any changes you want to make to the environment: props, architecture, etc.
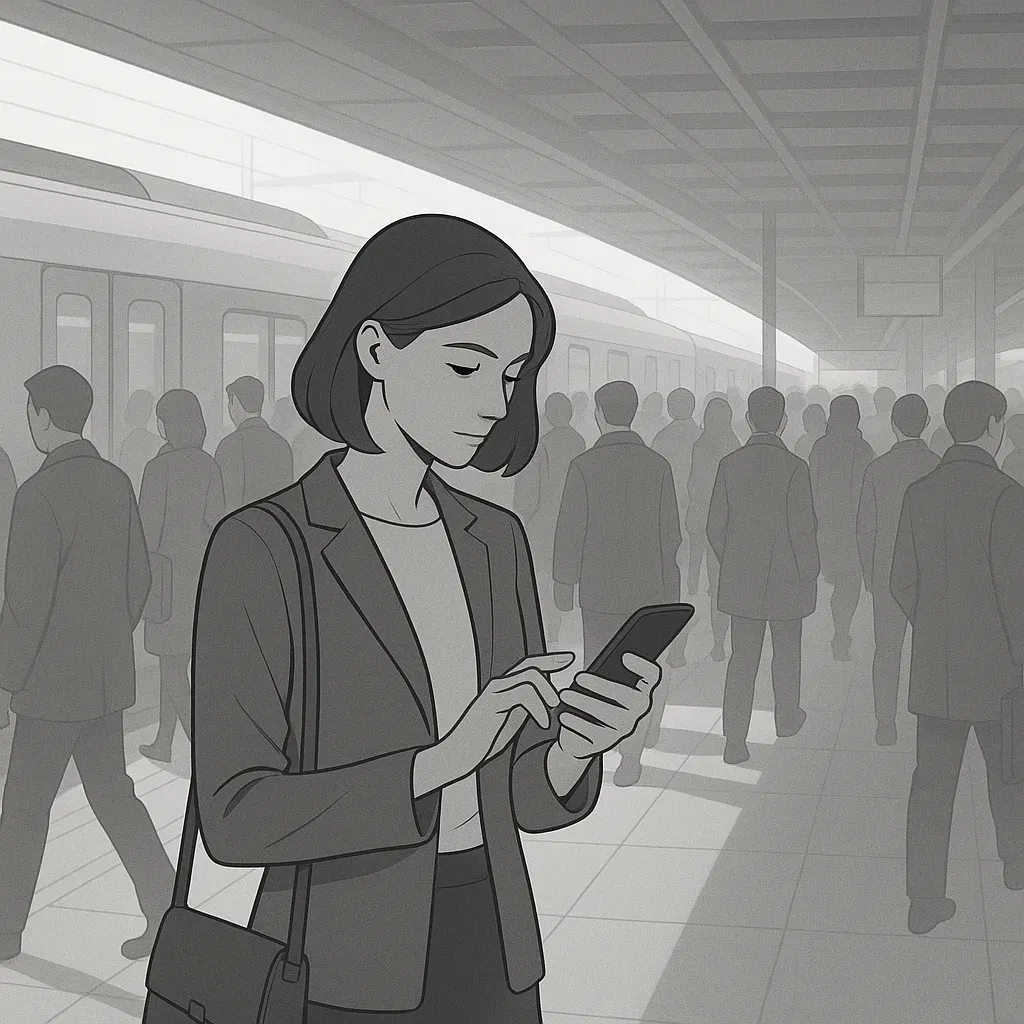
A woman in her mid-30s is standing on a railway station platform, using a smartphone. The platform is very busy as it’s the morning commute rush hour.
Mood and lighting
Then layer in weather, lighting and mood.
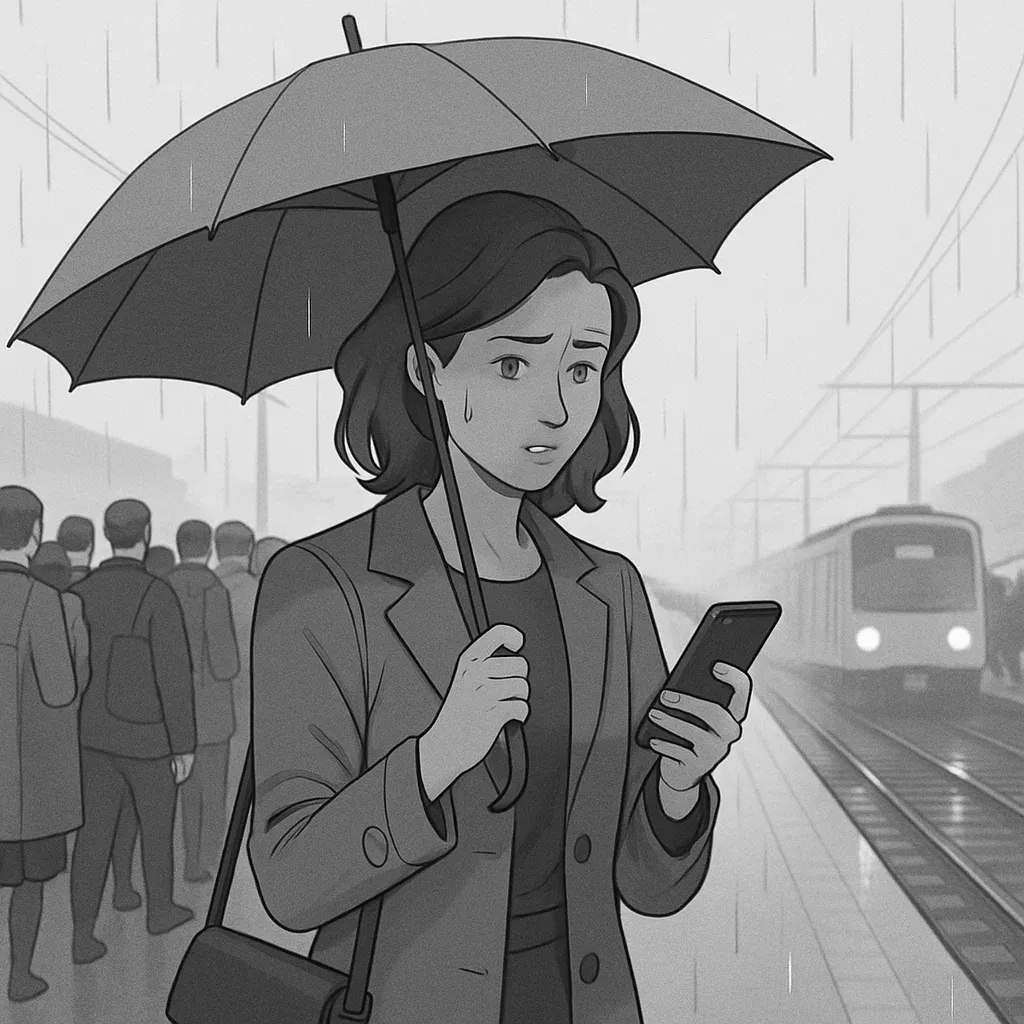
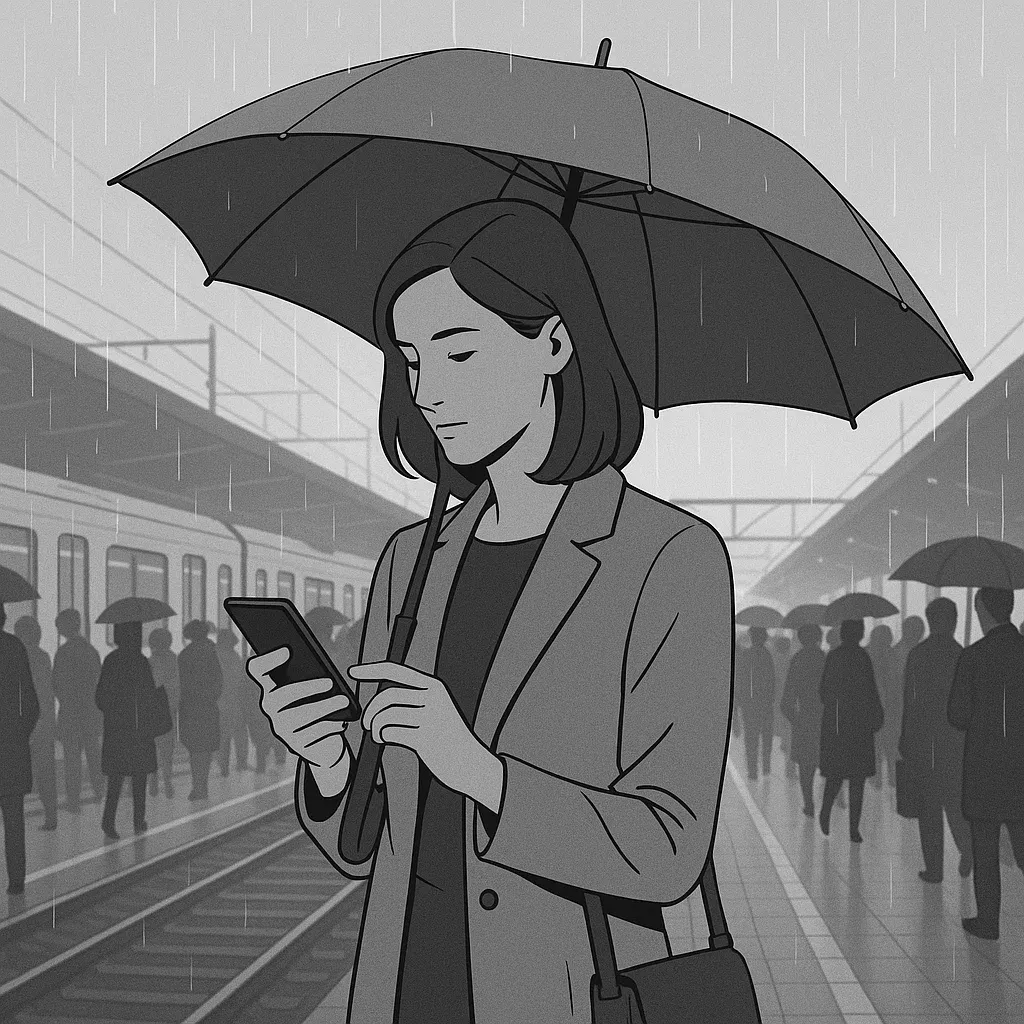
A woman in her mid-30s is standing on a railway station platform, using a smartphone. The platform is very busy as it’s the morning commute rush hour. It is raining. The platform has no roof, so she holds an umbrella with one hand and uses her phone with the other.
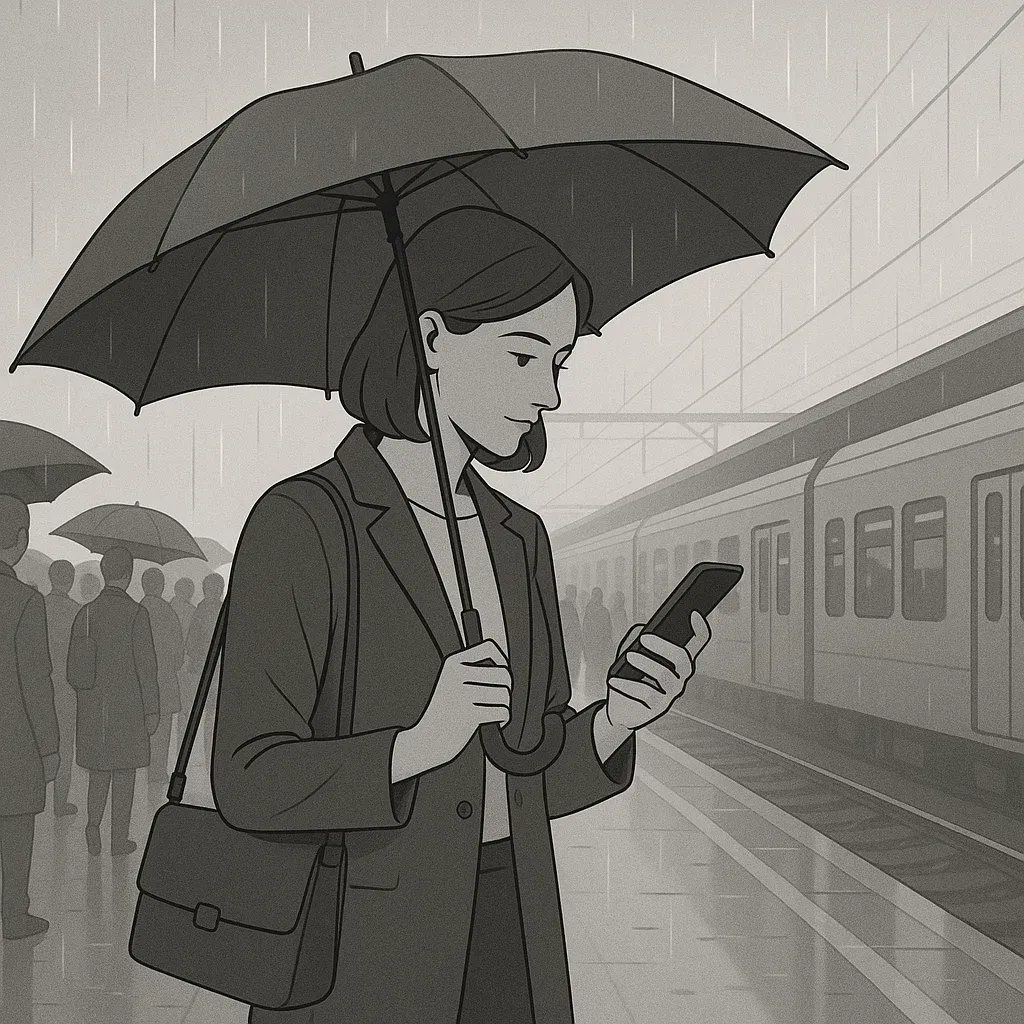
A woman in her mid-30s is standing on a railway station platform, using a smartphone. The platform is very busy as it’s the morning commute rush hour. It is raining. The platform has no roof, so she holds an umbrella with one hand and uses her phone with the other. She looks anxious (although not sad) as she needs to make sure she gets the next train.
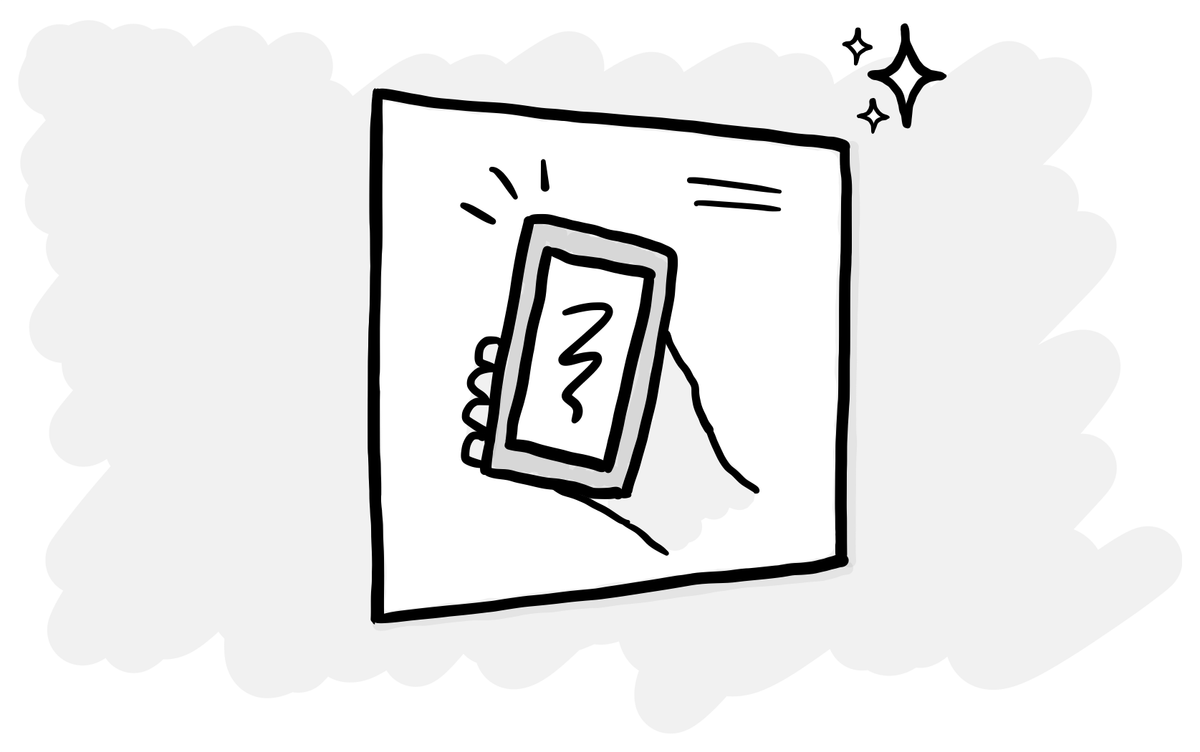
Interface shots
You’ll likely need to show a device being used, even if you don't want to show a detailed UI.
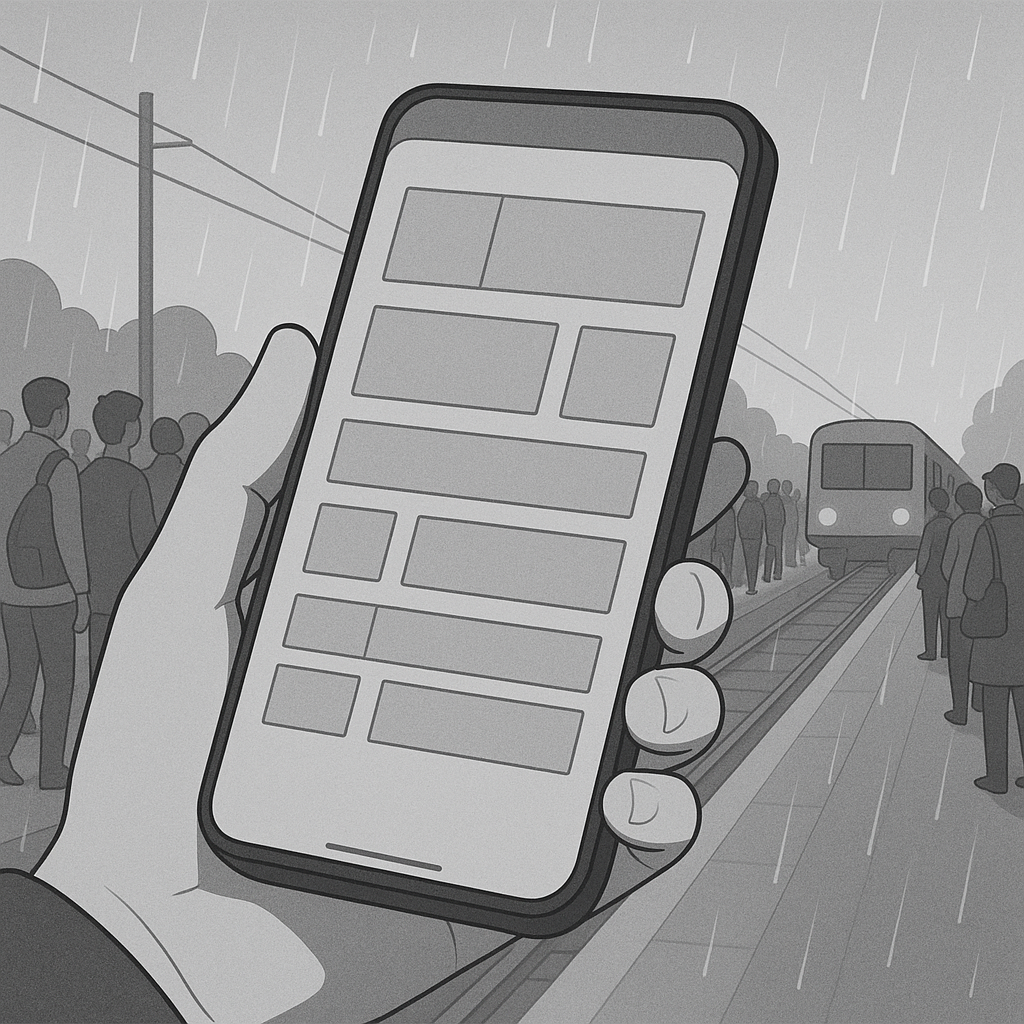
A close-up of a smartphone, which fills most of the image. It is held in one hand by an adult. The smartphone screen shows train times. The UI is a blocky concept wireframe with no detail and no text.
In the background, there is a railway station platform. The platform is very busy as it’s the morning commute rush hour. It is raining and the platform has no roof. We only see one of the user’s hands holding the phone.
Continuity between shots
In a storyboard, you’ll likely want to show the same character doing different steps. ChatGPT/Sora isn't perfect at doing this, but it does support this. To use the same character in the next image, you can prompt/remix with something like:
A woman in her mid-30s is standing on a railway station platform, using a smartphone. The platform is very busy as it’s the morning commute rush hour. It is raining. The platform has no roof, so she holds an umbrella with one hand and uses her phone with the other.
Then:
The same woman, but sat on the train that she was waiting for, reading a book.
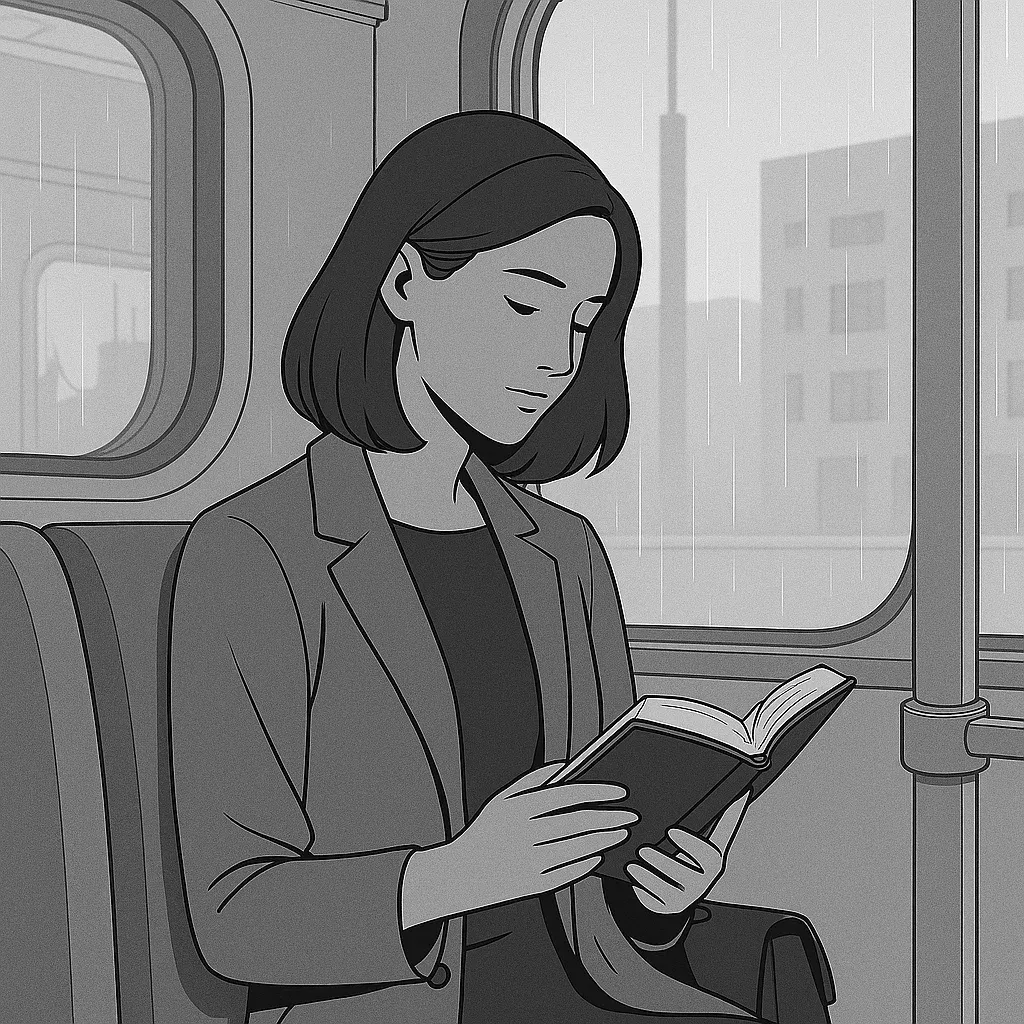
Here it’s done a pretty good job: her face, hair, clothes and even handbag are accurately rendered across both shots.
Guarding against weird quirks
Whatever you do, you will find that the models won't always follow your instructions or they’ll produce weird and nonsensical images.

In many cases, you have to just try again or tweak the prompt, but there are some things you can do to reduce this.
My top tip on this is to only include relevant details. The model will do its best to interpret and include everything you write in the prompt, so only describe things that you would see if you took a photo of the same scene.
For example, if you say that there is “a diabetes patient sitting on the sofa” it is going to find some way to show that they have diabetes. In reality, diabetes patients look like everyone else when they are sat on the sofa, so you can just prompt “an adult sitting on the sofa” instead.
Next week: visual styles
If you made it this far, you can see why I split this into two posts!
Next week, I’ll share a variety of visual styles you can copy and paste into your prompts, for use with concepts and storyboarding.